QC Individual Items in the Documents Window
To QC items in the document list window, review the following information.
Before you begin, see Create or Delete User-Defined Flags for information about adding user-defined flags to the QC Flag list. You may want to add QC flags before you begin the QC process.
|
|
Note: The job type (Processing or Data Extract) determines the availability of the QC functions. |

- Open the eCapture QC module. For instructions, see Start the eCapture Quality Control Module.
-
Create QC sessions as necessary. For more information on this process, see:
-
Select a session tab.

When you initially create a session for a Processing Job or Data Extract Job, you have the option to create more than one. For each session you create, a corresponding tab displays in the Documents window and contains the conditions you selected. For example, you may have selected the Category Microsoft Word, and then selected the Passed QC flag. When you mouse over the session tab, it shows that information.
-
Select the first item in the Documents window. If necessary, customize the displayed fields.
To sort a column, click the column heading. The order of the items reverse direction, from ascending order to descending order, and vice versa.

-
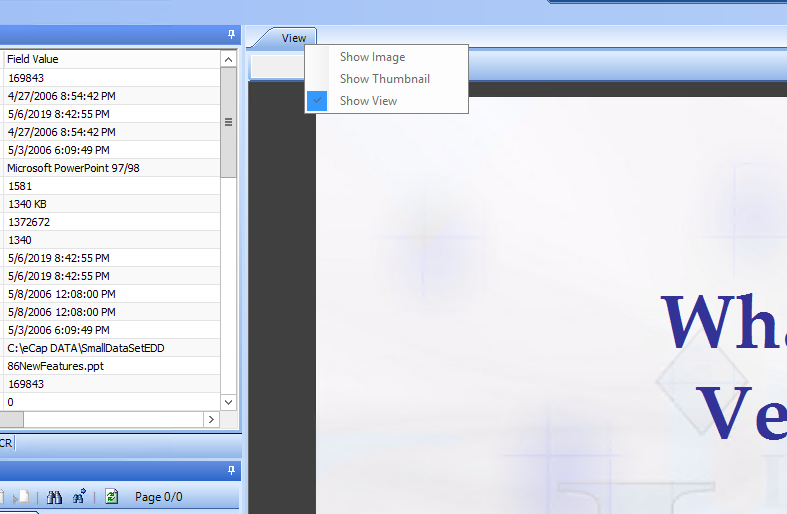
Select an Image View area tab (Image, Thumbnails, or View).

-
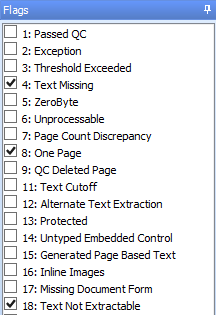
Notice the QC flags in the Flags pane. One or more of these flags may already be set.

-
Begin to QC using the QC function toolbar icons (availability of icons depends on the Job type) described in the following table:

|
To |
Click |
Result And/or action |
||||
|---|---|---|---|---|---|---|
|
Accept an item |
or the Passed QC flag |
The item remains in the list until you close QCing for the Processing Job or Data Extract Job. The system flags the item as Passed QC. SHORTCUT: By pressing ENTER on the keyboard, you move to the next image in the list and apply the Passed QC flag automatically. To remove the Passed QC flag, simply press the DELETE key on the keyboard. You may now assign a flag or flags that are appropriate for the current image. |
||||
|
Reject an item |
|
Rejects a previously accepted item. The Passed QC flag is no longer assigned to that item. |
||||
|
Auto-QC |
|
The system automatically scrolls through each image based on the settings in the Auto-QC Options dialog box. After invoking Auto-QC, use the + to increase speed by 25% or use the - to decrease speed by 25%. |
||||
|
Show Reprocess Options |
|
Opens the Reprocess Options dialog box applicable for the Processing Job (General, Excel, Word, PowerPoint) or for the Data Extract Job. |
||||
|
Reprocess the selected item
|
|
The item is reprocessed by eCapture and remains in the list until it is flagged as Passed QC. If you hold down CTRL and click the icon, it will force the documents through Oracle (formerly Stellent) instead of the document type routines of eCapture. This does not apply to IBM Notes emails, which cannot be handled by Oracle. When the Image to PDF option is selected in the General tab (Processing Options), the image is reprocessed as a PDF and stored in the Output directory. If reprocessing a Data Extract document and one or more OCR options were selected in the Options for Data Extract Job dialog box, a dialog box displays and indicates OCR is being performed on the document - page by page. The OCR operation may be cancelled if necessary. Cancellation results in all pages where OCR was not attempted, to be considered an OCR failure. The primary reprocess operation updates the OCR Low Confidence (average for all pages) flag accordingly. When Streaming Imaging Jobs are reprocessed, an Autoloads dialog box displays and indicates the status of the reprocessed document. If you have auto-loading configured, for Streaming Discovery and Enterprise Imaging jobs, you are not required to manually push QCed items into an Ipro Eclipse/ Enterprise Review. When you QC and then reprocess an item that has been autoloaded into Eclipse, changes to the item that you make in QC are overlaid on the item in Eclipse. This happens automatically when you select a reprocess option for items in a selection session. When you select items for reprocessing, in QC the reprocessing is a single-threaded job regardless of the number of items being reprocessed. |
||||
|
Reprocess an item in its native application
|
|
The native application opens. Ensure that the default printer is a Premium EDD Driver. Click the application’s Print button to reprocess the item. Close the native application. The item is reprocessed and remains on the list until it is flagged as Passed QC. The metadata is populated. If you hold down CTRL and click the icon, a dialog box displays that allows you to view the item by using the selected application. |
||||
|
Reprocess selected in Native Application through ShellExecute Print (Applies to both Processing Job and Data Extract Job sessions)
|
|
Files must have an associated Print command for this feature to function without user intervention. This feature works best with Office, HTML, and text documents. Office 2007 or later is required for the full functionality of this feature. The Office 2003 Print command does not work with HTML emails. If there is no associated Print command, the QCer is prompted to Native Reprocess. There should be a user monitoring the ShellExecute Print Reprocess as there may be dialog box prompts, such as an error opening the native application, that will not be handled automatically. |
||||
|
View in Native Application
|
|
Opens item in the native application for viewing. If you hold down the CTRL key and click the icon, a dialog box displays that allows you to view the item by using the selected application. Useful for testing output. |
||||
|
Reprocess all documents in the list |
|
All documents in the list are reprocessed. If you hold down CTRL and click the icon, it will force the documents through Oracle (formerly Stellent) instead of the document type routines of eCapture. This does not apply to IBM Notes emails, which cannot be handled by Oracle. |
||||
|
Rotate every page in the document to the left |
|
Rotates every page in the currently selected document 90 degrees to the left. |
||||
|
Rotate every page in the document to the right |
|
Rotates every page in the currently selected document 90 degrees to the right. |
||||
|
OCR Pages with missing text |
|
OCRs the current document selected in the list. Hold down CTRL and click this icon to force OCR of all pages in the selected document. Documents (images and PDFs) may be OCRed in Processing Jobs only.
To OCR a group of non-contiguous documents, CTRL-click each document in the list separately. Each selected document is highlighted. To OCR a group of contiguous documents, click the first document in the list and then SHIFT-click another document in the list. These two documents, along with the documents that are located between them, will be OCRed. All documents in this contiguous group are highlighted. During OCR, a Progress dialog box appears. If the job is cancelled, a prompt displays to indicate that OCR was aborted by the user.
|
||||
|
Replace Document Images with a Document Placeholder image |
or Ctrl + |
Launches the Select Placeholder dialog box in which an existing, specific user-defined placeholder can be applied to the document. User-defined placeholders may be created while an Enterprise Imaging Job session is open. New or modified placeholders are then immediately available for use.
After the placeholder is applied, a new load file is created and the image is automatically loaded back to the case in Eclipse. A new directory is created beneath the output directory supplied when the Enterprise Imaging Job is created named QC0000X, where X is the identifier for the reprocess/placeholder operation. The new placeholder images are created in this directory as well as the load file(s) that contain(s) the information about the documents that were replaced with placeholders. A callback is executed to load the new set of images into the review application such as Eclipse.
Related Topics: |
||||
|
Delete selected page |
|
Deletes page in the image window. A deleted item is not exported. None of the item’s information will be referenced.
After deletion, a new QC volume directory is created beneath the original Enterprise Imaging Job’s output location, and the remaining pages of the document are moved into that volume directory. Bates renumbering takes place to avoid gaps. A new load file is created by using the options of the Enterprise Imaging Job and points to the remaining images. A callback is executed to load the new set of images into a review application such as Eclipse. |
||||
|
Delete page range |
|
Delete from current page through end of document. Deleted items will not be exported; nor will the information from the deleted items be referenced.
After deletion, a new QC volume directory is created beneath the original Enterprise imaging job’s output location and the remaining pages of the document are moved into that volume directory. Bates renumbering takes place to avoid gaps. A new load file is created using the options of the Enterprise Imaging job and points to the remaining images. A callback is executed to load the new set of images. into a review application such as Eclipse. |
||||
|
Mark Document As Exception |
|
The marked document shows up as an exception in the Exception Reports. This differs from the QC Flag because the document is displayed in the exception reports. |
About Exception and Unknown Files
Files that could not be processed successfully are flagged as exceptions. Generally, these files are password-protected or exceed the page count set for Max Page Threshold setting in the Processing Job Options: General Options tab. For example, if the setting was 10, then the result would be one placeholder image as well as the 10 pages that did process before reaching the threshold setting.
Placeholder images are used for the document instead of processed images.
Unknown files either have a placeholder image or are processed as is.
Viewing a document's metadata or Extracted Text/OCR
This section describes
Reviewing Extracted Text/OCR Data
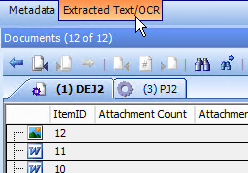
Click the Extracted Text/OCR tab above the Documents window. Each page then shows extracted text.
Reviewing metadata
Click the Metadata tab above the Documents window. eCapture QC supplies all document metadata gleaned during processing.
|
|
Note: You cannot edit the metadata. |
The Process Status field is included and shows a field value of either Failure or Success.
The metadata field Flag Status displays based on whether a follow-up flag was clicked for an Outlook message. In Outlook, the default setting is a transparent, clear flag. When the flag is clicked, it changes to red. When the red flag is clicked, it changes to a gray checkmark. The field values for the Flag Status field are 1, 2, and 3 depending on the number of times the follow-up flag/checkmark was clicked for the Outlook message.
|
|
Note: The Flag Status metadata field does not display in the metadata list in QC if the follow-up flag was not clicked for a message. |
Related Topics
eCapture QC Keyboard Shortcuts List
Create or Delete User-Defined Flags